Choosing Borders, Sizes, and Crops for your Art Prints
When we start working with a new artist on art prints through Assist, one of the most common questions is about borders and sizes. Should you go borderless or add a border? Should the border be even all the way around or is that even possible with different ratios? Is it okay to crop your pieces? The subject can be very difficult to discuss via a phone call or email exchange, but it’s much easier to understand with some visual examples. Below are visuals and explanations of the most common questions, as well as our advice for the best way to go in different cases.
Should I add a border to my prints?
Such a common question! First off, there isn’t just one right answer here. Though there are some things to consider, this is ultimately an artistic choice for you to make.
Your top considerations should be:
How will it effect framing?
Do you like how prints with borders look?
Is your piece close to common ratios?
Print borders and framing
Just one main thing to know here. In most cases, a frame is going to cut off 1/4” on each side of your print. An 8x10 mat for example actually has a 7.5 x 9.5 opening. Frames and mats are set up this way to make it easier to frame. The bit of overlap helps you avoid gaps and gives you a little wiggle room. One consequence of this is that if you do a 1/4” white border, you make it very difficult to frame and mat. The framer will need to get the alignment absolutely perfect or a thin white sliver will be visible.
Our advice: Do a border if you want, but don’t make it 1/4”! Go bigger so that the border shows even with a mat on top.
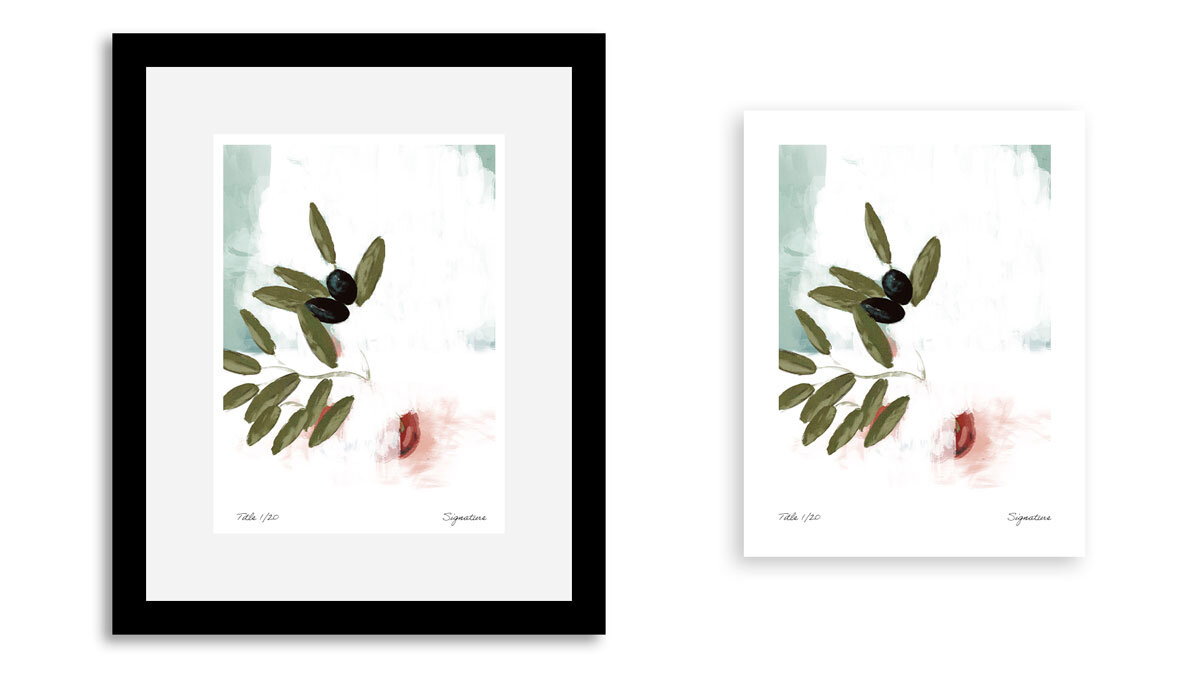
An example of a print with a larger than 1/4” border featuring art from Kynley Wallace of Okay Miss. This particular print has a larger border on the bottom to leave room for a title and signature. This is also a great space to include the number if the piece is a limited edition.
The same piece from Kynley Wallace shown borderless. Nice and simple, though part of the image does get cut off by the mat.
Print sizes and frames
For sizing, it’s easiest on you and your customers if you choose a standard size. Standard sizes are ones that you can walk into Michael’s, Hobby Lobby, Target, or pretty much any store and find an off the shelf frame for. 8x10, 11x14, and 16x20 would be three common examples.
Of course, you can choose “weird” sizes too. You can paint a 10x40 piece if that’s where your artistic vision takes you. Just know that if you or your customer want it framed, you’ll have to go to a frame shop to get a custom frame made.
If you offer framing through Assist, everything is cut to size, so we can do custom sizes! It’s all on demand, so there aren’t any costs up front to start offering frames on your website.
Crop or add a border to get to a standard size?
Have a piece that isn’t a standard ratio but feel convinced that offering standard sizes is the way to go? You have two main options.
First, you can crop your image. This is often fine if the original image is close to a standard size. For example, if you want to offer an 8x10 print and your piece would come to 9x10, it may make sense to crop it. This will vary from piece to piece since some images are fine to have a bit cut off and others look funny when cropped. It also is considered sacrilege by some artists to crop any part of their work out. That’s up to you to decide.
Second, you can place your image inside of the standard size with a border. Depending on the ratio of your piece, you probably won’t be able to have an even border, though this is pretty standard and most people think it looks fine. It can be a bit mind bending to explain and think about uneven borders (tell me again… why can’t they all be the same?). Check out this illustration.
An illustration of how rectangles will have uneven borders as they are resized featuring an image from artist Chelsea Howell of Howell Designery.
Our advice: If your image is close to a standard ratio and you’re okay with cropping, go borderless. If not, choose the minimum border size you want (1.5” on the top and bottom for example) and go with that.
Our follow up advice: Don't overthink this too much. It's not going to make or break your print sales. Pick something you like and run with it.
That’s it!


